
How to Get Meeting Transcripts (Even If You Didn’t Record)
Learn how to retrieve meeting transcripts even without a recording and implement a repeatable process to ensure future documentation. Discover DeepScribe's tools for effective transcription and note-taking.
DeepScribe Team
Content Team
How to Get Meeting Transcripts (Even If You Didn’t Record)
We've all been there: the meeting ends, important decisions were made, and someone asks for the transcript—only to find out it wasn't recorded. Before you panic, know this isn't a personal failure but a manageable ops challenge. You can still create a reliable written record using available artifacts and structured reconstruction. In this guide, we'll walk you through a step-by-step playbook to rescue those missing transcripts and ensure it never happens again. We'll cover how to assess existing materials, rebuild what you can with confidence labels, and implement a foolproof system using DeepScribe’s live transcription and meeting notetaker tools. By the end, you'll have a strategy to produce transcripts, decisions, and action items seamlessly for every meeting.
Introduction: The Dilemma of Missing Meeting Transcripts
Picture this: a meeting just wrapped up, yet the action items are already murky, and stakeholders are perplexed about what was decided. Worse, someone asks, "Did anyone record this?" And the consensus is that they didn’t. It's a relatable moment that many of us would rather avoid but often face—a discrepancy in what's remembered versus what was actually said. The core of the problem? A meeting transcript without recording usually feels like a pipe dream. But here's the thing—it's more of an operational hurdle than a personal failure.
BLUF: Without a recorded audio or video, you can't generate a verbatim transcript, but don't worry; all is not lost. There are ways to recover meeting notes and craft a reliable written record from what you do have—whether partial notes, chat logs, or brief attendee inputs.
Enter DeepScribe, a tool that turns this ops problem into a structured response. While you can't turn back time to record your meeting, DeepScribe helps you reconstruct the essence with its diverse suite, ensuring the mishap doesn't repeat itself. Picture this tool as your default layer for prevention and recovery: from real-time meeting transcripts, speaker-labeled outputs, to rapidly transforming any audio/video file through uploads.
But let's tackle this head-on. First, understand that parts of a meeting artifact might still exist: maybe someone wrote detailed notes or there's a comprehensive chat log. These can be pivotal in piecing together an incident-response workflow to produce what's called a "best-available transcript."
Here’s how you can approach this:
- Triage existing artifacts: Identify what snippets of information you have—memos, emails, screen recordings, or informal notes.
- Reconstruct: Piece these together, labeling each segment with a degree of confidence about its accuracy. This helps delineate between stated facts and interpretative recollections.
- Preventive Measures: Implement a seamless system ensuring future meetings yield a rich output—a transcript—and much more.
DeepScribe positions itself as the go-to solution, providing the capacity to transform this scenario through its innovative "Meeting Notetaker" and live transcription capabilities. Plus, it offers fast uploads for any audio or video remnants available.
So, instead of heart palpitations over missed recordings, it's about constructing a resilient workflow. Check out this How to Transcribe Meetings guide for more insights. You got this—let’s solve it together.
Triage: Identifying Existing Artifacts
So, you’ve found yourself in a meeting where nobody pressed “record”—but fear not! This isn’t a failure but an opportunity to flex some stellar ops skills. The key is to identify any existing artifacts that can help reconstruct what transpired.
Start by Checking for Any Audio or Video
First, scavenge for hidden gems in the form of unintentional recordings. Did anyone screen share and capture audio in the process? Perhaps a participant dialed in via a platform that automatically records. Check the meeting platform's settings to see if auto-recording is enabled by default.
Next up, engage with attendees. Send a brief, friendly inquiry asking if anyone recorded the session inadvertently. Use a quick script like:
“Hi team, I hope everyone’s well! Quick question: did anyone happen to record today’s meeting? It’d be incredibly helpful for ensuring accurate follow-through. If you did, a swift upload to our shared drive would be fantastic!”
Delve into Calendar Attachments, Chat Logs, and Emails
Often, meeting artifacts are hidden in plain sight. Take a tour of your email and meeting invites. Many platforms allow attachments to calendar events—check here for any shared presentations or documents that can add context. Similarly, chat logs often contain ongoing note-taking or crucial links shared in the moment.
Scanning through old emails for recaps is another solid move. Meeting organizers frequently send follow-up emails summarizing decisions and key points. These meeting recap emails offer a quick capture of the essential takeaways you can build upon.
Assess Written Notes
Sometimes, the best insights come from personal written notes. Ask a trusted colleague if they jotted down any comments or reminders. Even rudimentary notes can offer clues or spark memory jogs that fuel your transcript reconstruction efforts.
Quick Artifact Checklist:
| Artifact Type | Location | Action Required |
|---|---|---|
| Audio/Video Files | Meeting platforms, drives | Request uploads from participants or check integrations |
| Calendar Attachments | Email invites | Review for attached documents or links |
| Chat Logs | Meeting platforms | Export or save chat history for reference |
| Emails | Inbox | Search for recap emails or shared resources |
| Written Notes | Colleagues' notebooks | Ask colleagues for any notes and consolidate insights |
Understanding and utilizing these resources not only aids in creating a comprehensive decision log but also sets the stage for a more streamlined documentation process moving forward. By piecing together these elements, you can reconstruct a credible narrative of the meeting, turning what seemed like a lost cause into a captivated trail of thoughts ready for action.
Recovery Paths for Common Scenarios
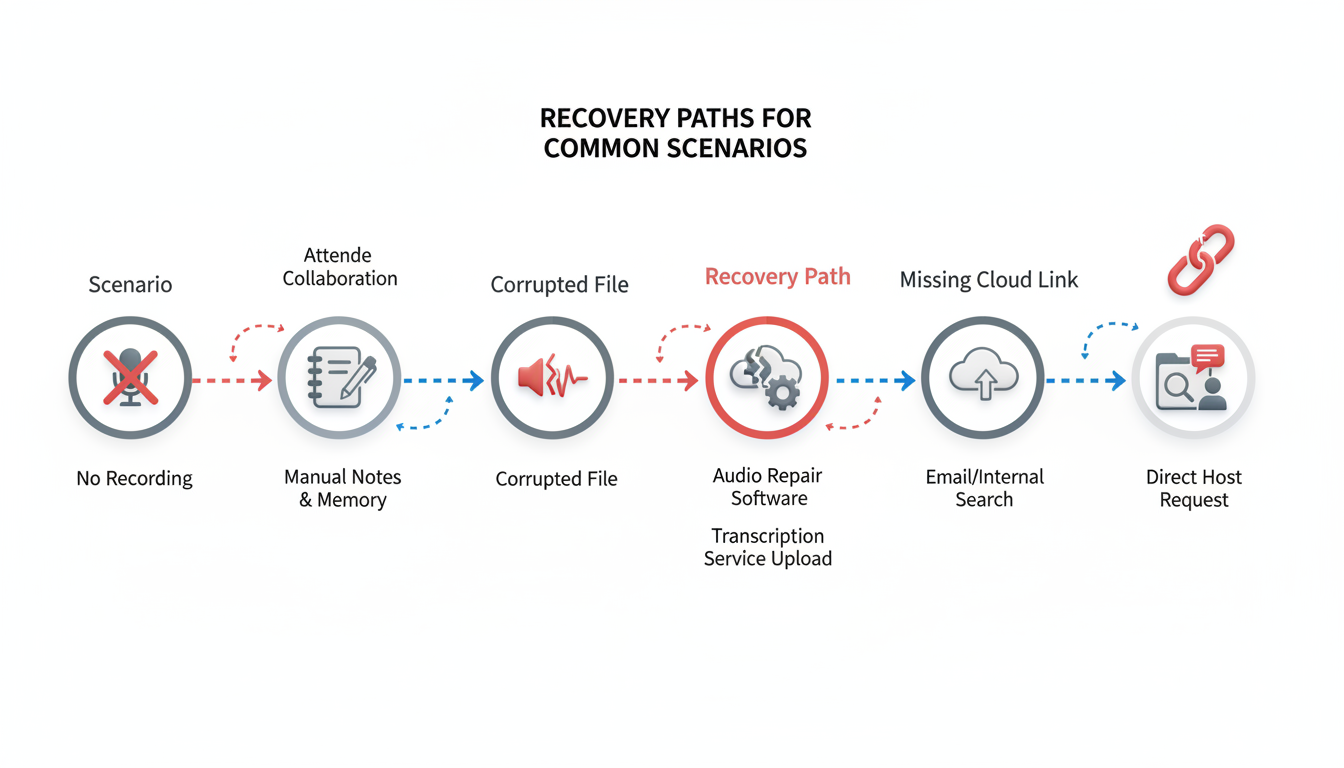
Navigating the unpredictability of unrecorded meetings can feel like finding your way in the dark. But fear not, those elusive meeting transcripts are within your grasp with a few strategic moves. Here, we'll walk through several recovery paths based on common scenarios you might encounter.
Scenario 1: Someone Else Recorded the Meeting
Key Insight: Before diving into reconstruction efforts, ensure you're not duplicating work by checking with your team.
Action Steps:
- Ask the Host: If someone else hosted the meeting, politely request the recording. Use a simple script like: "Hey [Name], I was wondering if the meeting was recorded. Could you share the recording with me, please?"
- Team Check-In: Briefly survey teammates via chat or email—chances are, someone might have hit the record button.
- Platform Search: Look for automated recordings in your meeting platform’s storage, especially if it's a recurring meeting.
When You Retrieve It: Use DeepScribe’s upload feature to transcribe the audio or video swiftly. With its Whisper-powered accuracy—boasting a 99% claim—you’ll have high-fidelity transcripts ready in minutes.
Scenario 2: Partial Recordings
Key Insight: Completing gaps requires a mix of creativity and structured follow-ups.
Action Steps:
- Locate Partial Files: Check if segments of the meeting were recorded by different attendees. These often exist in email attachments or cloud storage links.
- Collect Existing Notes: Aggregate notes, even if they’re bullet points. An individual’s notes might cover parts missing from the recording.
- Cross-Reference: Use existing agendas, chat logs, and notes to fill the gaps left by partial recordings. Label these sections clearly for transparency.
Integration Tip: Once collected, run everything through DeepScribe’s transcription service to generate a more cohesive document. Aim to use the Business plan’s ability to handle up to 10 GB files for combining diverse media.
Scenario 3: Phone Dial-Ins and Call Logs
Key Insight: Don’t overlook the humble phone log for reconstructing attendee participation.
Action Steps:
- Access Call Logs: Many conferencing systems log dial-in numbers. Use these to verify who spoke and when.
- Request Call Records: Ask the call host or the telecom provider for records if substantial participation occurred via phone.
Proceed with Care: While call logs lack content, they’re crucial for verifying timelines and aiding in the alignment of disparate notes. Use DeepScribe’s speaker detection and labeling to reconstruct who said what during gaps.
Scenario 4: Screen Recordings Available
Key Insight: Screen recordings, while visual, often hold rich audio content crucial for transcription.
Action Steps:
- Extract Audio: Tools like VLC Media Player or QuickTime can extract audio tracks from screen recordings.
- Transcribe Extracted Audio: Send the audio to DeepScribe for a speedy transcription. Its support for multiple file formats—including MP3, MP4, and WAV—simplifies this process.
Bonus Step: Use speaker labels obtained from the meeting to ensure clarity in the transcript.
Scenario 5: Only Chat Logs Exist
Key Insight: In the absence of spoken word recordings, chat logs can serve as skeletons for meeting notes.
Action Steps:
- Organize the Chat: Export chat logs and arrange them chronologically. This helps visualize the conversation flow.
- Compliment with Agenda/Notes: Interlock chat log highlights with agendas or notes to form a narrative.
Visual Recap: Given the linear nature of chat discussions, use DeepScribe’s ability to craft AI summaries and action items—integrating these directly as meeting decisions.
Takeaway: "No recording, no problem!" Use your artifacts creatively to patch together a reliable transcript.
With these strategies, recovering meeting transcripts becomes a manageable task, transforming what might seem like chaos into order. Tools like DeepScribe enhance this transformation, ensuring every word is captured moving forward. Remember, the right recovery path for unrecorded meetings involves organized action and reliable technology—you’ve got this!
Creating a ‘Best-Available Transcript’ without Recordings
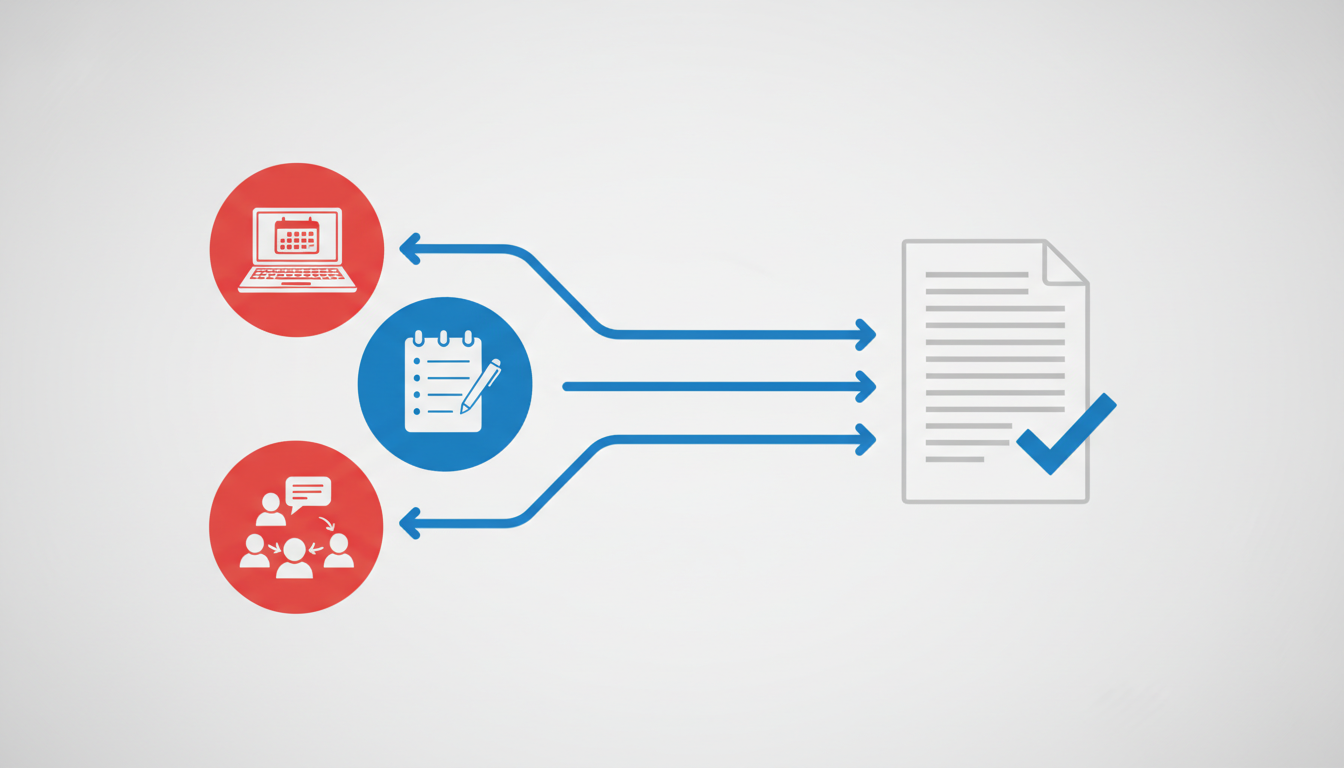
If you ever find yourself without a recording of a crucial meeting, don’t worry—it’s a challenge, but definitely not an insurmountable one. Here’s a comprehensive plan for reconstructing a best-available transcript from the remnants of a meeting’s documentation.
Step 1: Gather Existing Artifacts
Begin by triaging any materials that might offer insight into the meeting’s flow. Think email threads, meeting agendas, slide decks, and chat logs. These artifacts will be your foundation. Often, fragments from these sources contain key terms or phrases that trigger a memory of what was discussed.
Step 2: Reach Out for Recollections
Contact meeting attendees, starting with the host, and ask for any notes taken. Use a script like:
"Hey [Name], I'm reconstructing the minutes of our recent meeting for better clarity on our next steps. Do you mind sharing your notes or any key takeaways you captured?"
Sending a brief follow-up email is a useful tactic. Request specifics, like decisions made or action items discussed, which can help fill crucial gaps.
Step 3: Structure the Reconstruction
Compile the gathered data into a coherent format. Typically, it’s best to:
- Organize the content chronologically.
- Clearly mark action items and assign them to correct stakeholders.
- Highlight decisions made, ensuring everyone is on the same page.
When reconstructing, apply confidence labels. This is essential; it distinguishes confirmed facts from educated guesses. For instance:
- High confidence: Clearly stated objectives or decisions you can verify.
- Moderate confidence: Elements multiple participants remembered similarly.
- Low confidence: Anything that seems significant but isn’t well-substantiated.
Step 4: Use Templates for Consistency
Using a structured template for your transcript not only organizes thoughts but also maintains consistency across reconstructions. Here’s a basic framework:
- Introduction: Meeting date, time, attendees
- Agenda: List of topics discussed
- Discussion: Main conversation points labeled with confidence ratings
- Decisions: Confirmed choices with responsible parties
- Action Items: Next steps with designated responsible persons and deadlines
Step 5: Verification and Feedback
Distribute the draft to all attendees, ensuring they can provide feedback. Prompt responses with a recap email, encouraging them to confirm accuracy or suggest corrections. Here’s a sample to get you started:
"Hi team, attached is a draft of our meeting’s minutes. Please review and provide any corrections or additional insights by [date]. Your quick feedback ensures we stay aligned and informed."
This collaborative approach not only enhances the transcript’s accuracy but also involves all team members in its creation, fostering a sense of ownership and engagement.
By following these steps, you can create a reliable, detail-rich meeting record that transcends the absence of an original recording. And to prevent this hassle in the future, consider integrating tools like DeepScribe for live transcription and note-taking, ensuring you never miss out on crucial information again.
Prevention: Establishing a Transcript Coverage SOP
Creating a Standard Operating Procedure (SOP) for capturing meeting transcripts is like setting up a reliable safety net. It ensures that decisions, action items, and key discussions are never lost—even if someone forgets to hit the record button. With the right tools and strategies, everyone from team leads to ops managers can easily establish a system that guarantees comprehensive transcript coverage for all meetings.
DeepScribe’s Meeting Notetaker is an excellent ally in this endeavor. It leverages live transcription to capture meetings in real-time, thus eliminating the dreaded “no recording, no transcript” scenario. By integrating this tool, your meetings become automatically documented. This translates not just into transcripts, but also structured outputs like summaries and action items—ideal for keeping all stakeholders on the same page.
Here’s a step-by-step guide to implementing your Transcript Coverage SOP:
1. Select a Dedicated Notetaking System
Choose DeepScribe as your default system. It’s designed to auto-join from your calendar, making it effortless to integrate into existing workflows. The meeting bots ensure every discussion and decision is captured with speaker-labeled output. This set-up not only provides a verbatim account but also aids in creating clear and reliable meeting minutes.
Takeaway: An integrated system ensures that human errors, like forgetting to record, don’t disrupt your information flow.
2. Define Meeting Roles and Responsibilities
Assign roles—such as meeting leader, timekeeper, and action item tracker. When everyone has a clear role, it ensures meetings are more frequent and efficiently recorded. With DeepScribe, you can minimize human input while maximizing accuracy and efficiency in capturing talks using its 99% accuracy capabilities.
3. Implement Structured Outcomes
Use DeepScribe’s AI to automatically generate summaries, decisions, and action items post-meeting. These features are part of the Pro and Business plans, which provide full AI suites for deeper insights. Structuring outcomes this way makes follow-ups seamless and leaves no room for misinterpretation.
4. Ensure Security and Compliance
DeepScribe is SOC 2 Type II compliant, offering peace of mind with end-to-end encryption and automatic file deletion after processing. This compliance is crucial for maintaining privacy, especially when sensitive information is discussed during meetings.
5. Establish a Review and Distribution Process
After meetings, review the transcripts and use them to send out a concise meeting recap email. This distribution step ensures everyone is aligned and any necessary corrections can be made quickly.
Expert Insight: Many organizations find that creating a reliable transcript SOP streamlines communication and enhances stakeholder accountability. A consistent process such as this significantly mitigates the risk of losing critical discussion points.
Utilizing DeepScribe not only helps in recovery and prevention but also positions your team to operate with a robust, efficient, and transparent meeting workflow. For further insights on effectively transcribing your meetings, visit DeepScribe’s blog on transcription tools.
Governance: Consent, Privacy, and Sharing
Navigating the consent and privacy landscape for meeting recordings is just as crucial as planning the meetings themselves. When considering recording a meeting, always ensure that you have obtained explicit consent from all participants. This not only fosters trust but also aligns with legal guidelines in many jurisdictions that require consent when recording conversations.
When it comes to privacy, you should look for solutions that prioritize data protection. DeepScribe stands out with its end-to-end encryption and SOC 2 Type II compliance, ensuring that your transcripts remain secure throughout the transcription process. These features are particularly important for organizations concerned with data privacy and compliance with regulatory standards.
Once you have your transcripts, managing the sharing and retention of these documents is crucial. Here are a few best practices to keep in mind:
Limit Access: Share transcripts only with individuals who need access. Use permission settings if available to control who can view or edit the document.
Set Retention Policies: Define how long transcripts should be retained and ensure they are deleted when no longer needed to reduce the risk of sensitive information exposure.
Use Secure Channels: When sharing transcripts, use secure platforms that offer encryption to prevent unauthorized access.
Key Takeaway: Prioritize consent and privacy by using secure, compliant tools, and make informed decisions about sharing and retaining sensitive information.
By integrating a tool like DeepScribe, which combines sophisticated security measures with user-friendly features, you ensure that your transcription process is both efficient and secure. For more detailed insights about using transcription technology effectively, check out DeepScribe's blog, where you'll find valuable tips and tutorials tailored to your needs.
10-Minute Setup Checklist for DeepScribe Integration
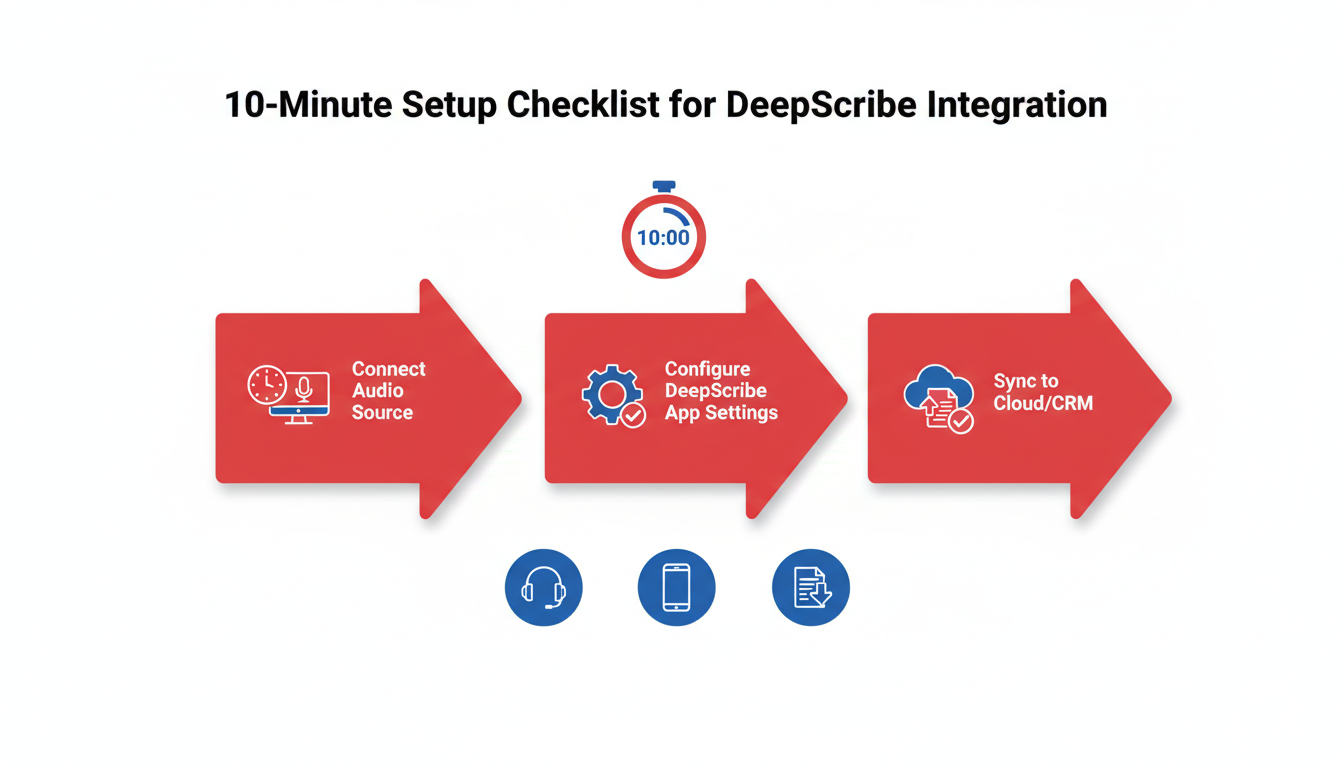
Setting up DeepScribe to ensure you never miss meeting transcripts again is as straightforward as it gets. Let’s break it down into manageable steps that can be completed in just 10 minutes.
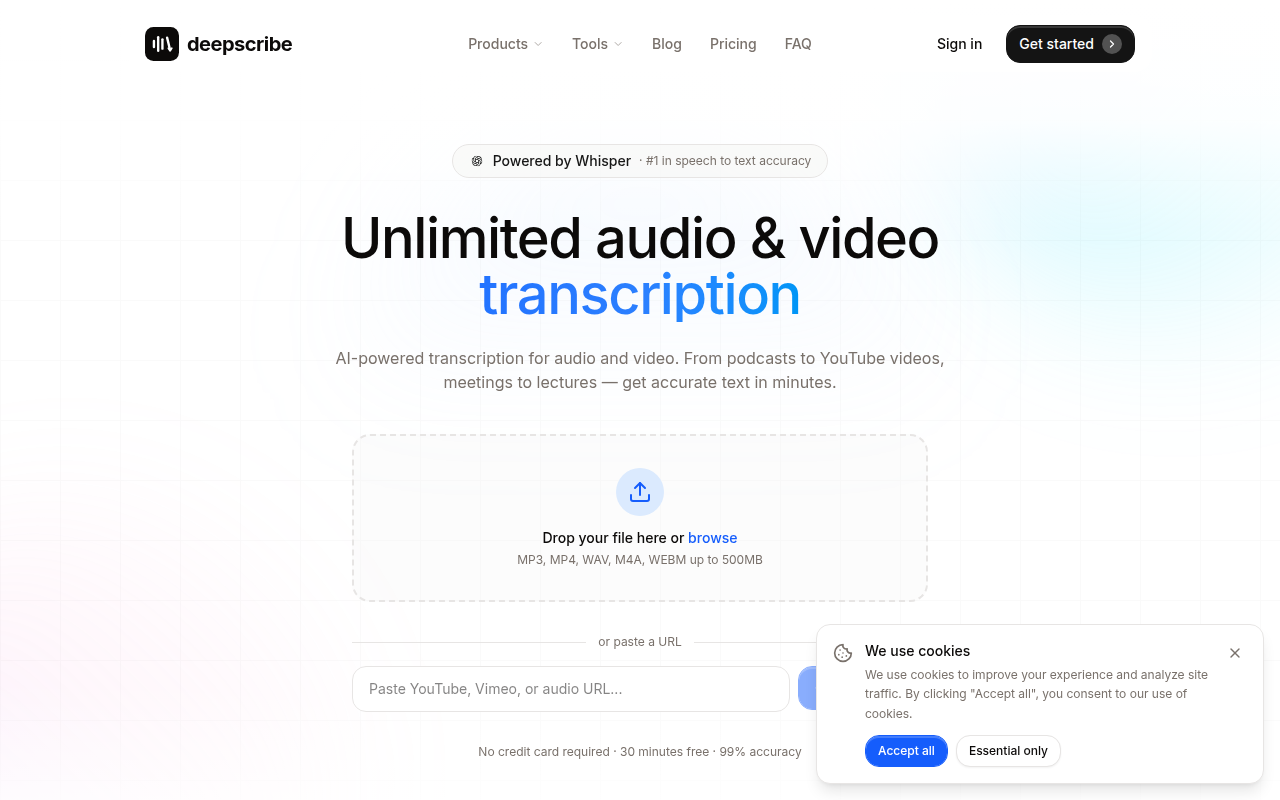
Step 1: Sign Up for DeepScribe
Begin your journey by quickly signing up for a DeepScribe account. With no credit card required for the Free plan, it's an easy entry into the world of efficient transcription management. You’ll benefit from 30 minutes of free transcription each month, giving you a taste of what’s possible with this powerful tool. Once signed up, you’ll be ready to dive into the detailed features.
Step 2: Integration with Calendar Tools
Next, sync DeepScribe with your existing calendar system. Whether you use Google Calendar, Outlook, or another platform, DeepScribe can seamlessly integrate to auto-join your scheduled meetings. This feature ensures that transcripts are captured without manual intervention, freeing you from the hassle of remembering to press ‘record’.
- Navigate to your account settings.
- Select “Integrations” and choose your calendar application.
- Follow the on-screen instructions to authorize the connection.
Key Takeaway: Integration means automatic transcription — no more human errors of forgetting to record.
Step 3: Configure Meeting Notetaker
Enable the Meeting Notetaker feature for optimal transcript capture. This tool will auto-join meetings and transcribe in real-time, providing speaker-labeled outputs for clarity. The Pro plan offers unlimited bots, further expanding your transcription capabilities.
- In your DeepScribe dashboard, activate the Meeting Notetaker.
- Set preferences for meeting types and bot auto-join specifics.
Step 4: Explore Meeting Workflow Templates
DeepScribe offers a range of meeting workflow templates that simplify capturing decisions and action items. Dive into these templates to see how they convert transcripts into structured documents, ready for immediate sharing and decision-making.
Step 5: Trial Enhanced Features
To fully leverage DeepScribe’s capabilities, consider trialing the Basic or Pro plans. These include advanced features like AI summaries and document export options (TXT, DOCX, PDF, SRT, VTT). Test these on a trial basis to see their impact on your efficiency and productivity.
- Activate the trial directly from your dashboard.
- Experiment with exporting various formats to suit your needs.
Final Checklist
- ✅ Sign up and set up your account.
- ✅ Integrate with your calendar.
- ✅ Activate the Meeting Notetaker.
- ✅ Use workflow templates for enhanced documentation.
- ✅ Trial expanded plans for higher utility.
By following these steps, you'll ensure seamless integration and have comprehensive meeting transcripts ready in no time.
Frequently Asked Questions
Can I get a transcript if no meeting was recorded?
Yes, using artifacts and reconstruction methods outlined in this guide.
What if only chat logs are available?
You can piece together a discussion-based transcript using chat logs.
How does DeepScribe ensure privacy?
DeepScribe uses end-to-end encryption and deletes files after processing.
What export formats does DeepScribe support?
Exports include TXT, DOCX, PDF, SRT, and VTT, depending on the plan.
Is there a free plan for DeepScribe?
Yes, DeepScribe offers a free plan with limited transcription minutes.
Final Thoughts
In wrapping up, here’s a quick recap of how you can efficiently recover and document meeting insights:
- Find Any Recording: Always ensure you search for any existing recordings before assuming they don't exist.
- Transcribe Fast with DeepScribe: If you have audio or video, use DeepScribe for quick and accurate transcription.
- Decision-Grade Reconstruction: If no recording is available, reconstruct the meeting based on notes and artifacts.
- Prevent Future Issues: Implement a robust SOP paired with a Meeting Notetaker or live transcription to avoid missing details in future meetings.
Ready to take the next step? Try DeepScribe for free—no credit card required—and consider implementing the provided SOP at your next recurring meeting. By doing so, you ensure that your meetings are comprehensively and accurately documented moving forward.
Written by

DeepScribe Team
Content Team
The DeepScribe content team shares insights on audio transcription and AI technology.